Enable image optimization for static HTML export with Next.js

Next.js offers you the option to statically export your website with the main benefit that you do not need a server but only a static file hosting service to serve your website.
But there is a catch: One of the main drawbacks of this approach is that Next.js does not support image optimization at build time and as there is no server, all of your images will be served unoptimized. Unoptimized images lead to slow websites and unnecessary network transfer as the end-user is provided with inappropriate image sizes for the screen size.
Even though image optimization for static HTML export in Next.js is a highly requested feature, you are currently thrown back to two not-so-great options:
- Use the standard < img /> tag to serve your large images without any adaption for different screen sizes.
- Manually optimize your images and provide the appropriate image with a corresponding srcset entry on the < img /> tag.
The first option leads to frustrated users as they have to load potentially large images of 1-3 MB when a 50 KB image would be sufficient for the mobile device they might be using to access your website.
The second option works great from the user perspective, but the developer experience is quite bad, and a lot of evitable work needs to be done.
Luckily, this can be automized...
Next-image-export-optimizer optimizes your images at export time
To solve this problem, I wrote the module next-image-export-optimizer that enables image optimization at export time. All the images that you want to be served optimized will be scaled to a predefined set of widths.
Additionally, to the improved load time, you can choose to convert the images to the modern and suggested WEBP image format. This new format will decrease the image file size even more in comparison to the legacy formats like JPG and PNG.
The < ExportedImage /> component of this library wraps around the < Image /> component of Next.js. Using the custom loader feature, it generates a srcset for different resolutions of the original image. The browser can then load the correct size based on the current viewport size.
In the development mode of Next.js, the < ExportedImage /> component falls back to the original image.
When you export the Next.js project, all images in the specified folder will be optimized by the module and reduced versions are created based on the requested widths. Under the hood, the library uses the same technology (sharp) to transform and convert the images as the Next.js server.
The image transformation operation is optimized as it uses hashes to determine whether an image has already been optimized or not. As long as the image remains unchanged, the transformation operation only needs to be executed once. Therefore, the export operation will not have any overhead once all images have been transformed by the module.
How to use image optimization with statically exported Next.js HTML
Get started by installing the module from your favorite module manager:
npm install next-image-export-optimizer
# Or
yarn add next-image-export-optimizer
pnpm install next-image-export-optimizer
Configure the library in your Next.js configuration file:
// next.config.js
module.exports = {
  images: {
    loader: "custom",
    imageSizes: [16, 32, 48, 64, 96, 128, 256, 384],
    deviceSizes: [640, 750, 828, 1080, 1200, 1920, 2048, 3840],
    nextImageExportOptimizer: {
      imageFolderPath: "public/images",
      exportFolderPath: "out",
      quality: 75,
    },
  },
  env: {
    storePicturesInWEBP: true,
    generateAndUseBlurImages: true,
  },
};
- Add the above configuration to your next.config.js
- Specify the folder where all the images are stored. Defaults to public/images. Images in subfolders of this specified folder will be optimized as well.
Change the export command in
package.json{ - "export": "next build && next export", + "export": "next build && next export && next-image-export-optimizer" }Change the < Image /> component of Next.js to the < ExportedImage /> component of this library.
Example:
// Old
import Image from "next/image";

<Image
  src="images/VERY_LARGE_IMAGE.jpg"
  alt="Large Image"
  layout="fill"
  objectFit="cover"
/>;

// New
import ExportedImage from "next-image-export-optimizer";

<ExportedImage
  src="images/VERY_LARGE_IMAGE.jpg"
  alt="Large Image"
  layout="fill"
  objectFit="cover"
/>;
In the development mode, the original image will be served as the optimized images are created at build time only. In the exported, static React app, the responsive images are available as srcset and will be dynamically loaded by the browser.
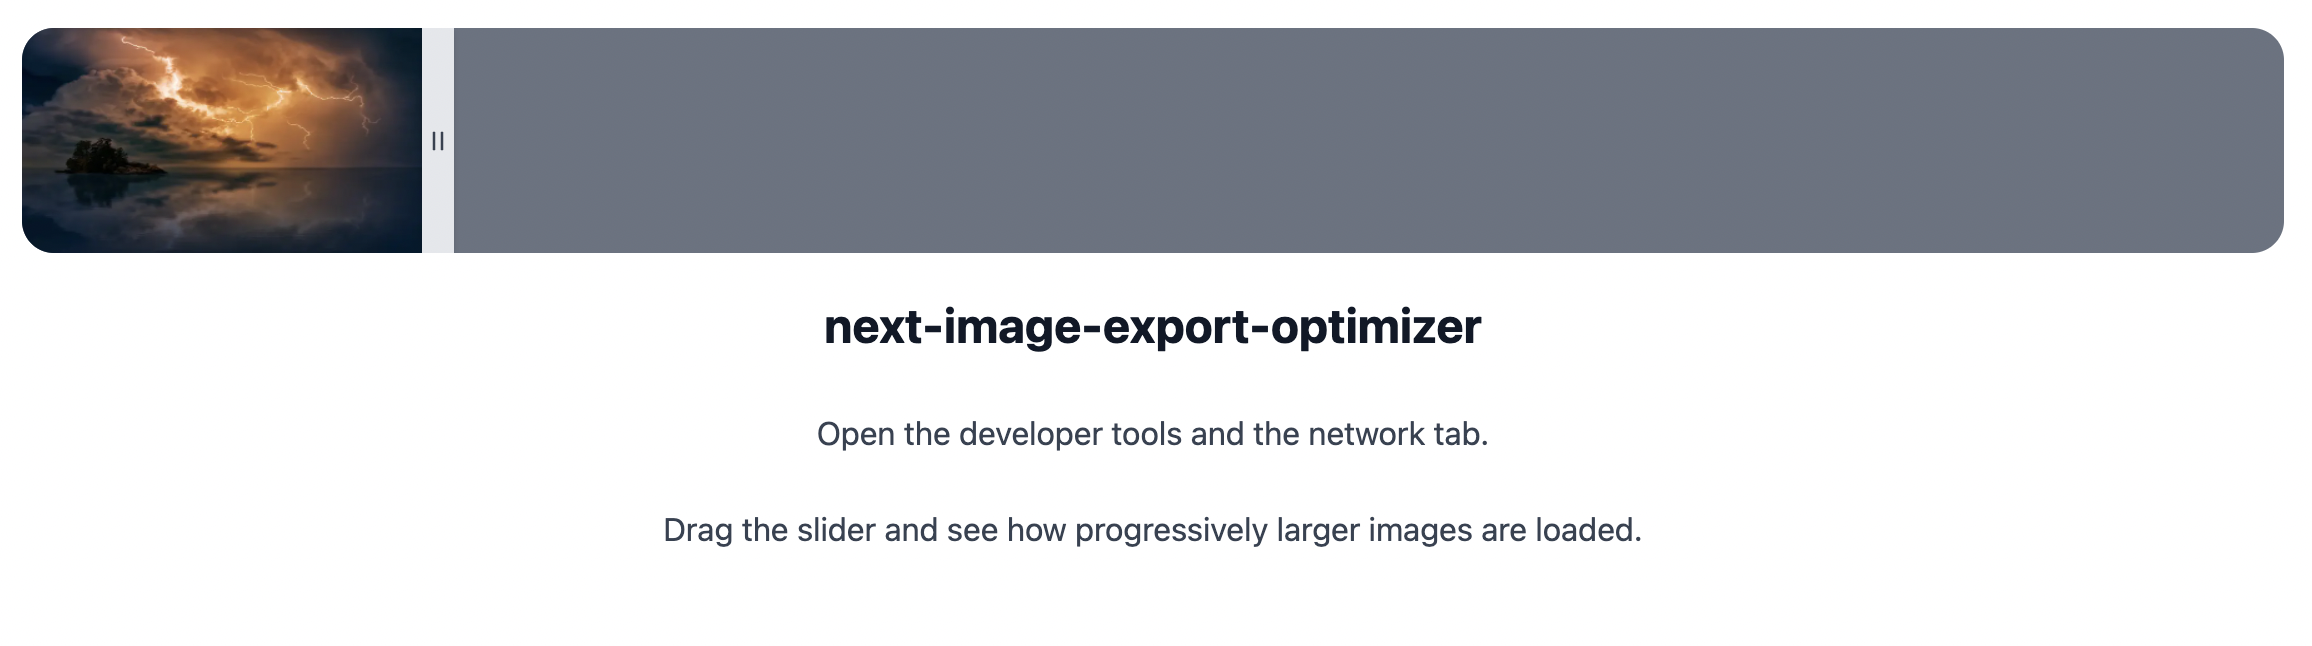
Live example of the library
If you want to see a live example of how the library works, go to this website reactapp.dev. Open the developer tools (hit F12 in Chrome) and the network tab. As you drag the slider, Chrome will request progressively larger images from the static file hoster (Firebase Hosting in this case).
Get the source code
You can find the source code on GitHub:
